
Food
Tamisie: The Delicious Culinary Secret You Need to Try
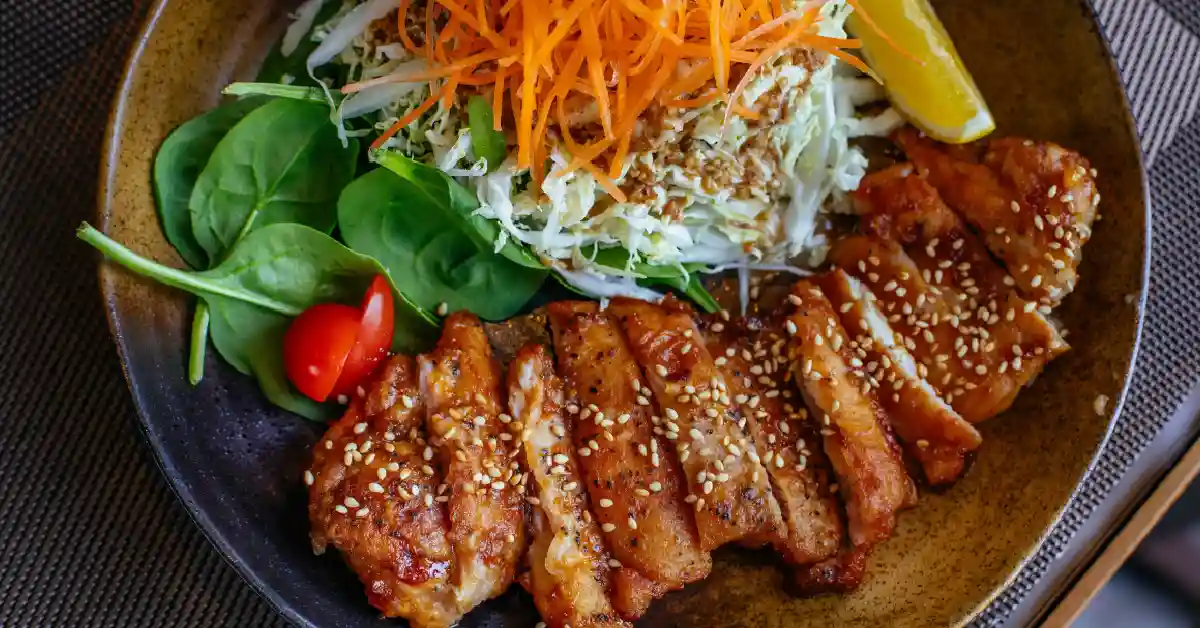
Food lovers across the world are always on the hunt for dishes that bring a perfect blend of taste, nutrition, and simplicity. Tamisie is one such culinary delight that is slowly capturing the attention of food enthusiasts everywhere. If you have never heard about it, you’re about to discover everything you need to know—from its origins and cooking methods to health benefits and practical comparisons with other popular dishes.
What is Tamisie?
Tamisie is a traditional delicacy made primarily with a mix of finely ground ingredients, often including rice flour or wheat flour, blended with natural flavors and steamed to perfection. It is known for its soft, spongy texture and subtle sweetness, making it a versatile dish enjoyed as breakfast, dessert, or even a light evening snack.
Its popularity is growing because it offers:
-
Simplicity in preparation
-
Nutritional value
-
Delicious taste
-
Cultural authenticity
History and Origin of Tamisie
The roots of Tamisie trace back to rural kitchens where families used locally available ingredients to create wholesome meals. Over the years, it evolved into a popular delicacy celebrated in food festivals and local gatherings.
Nutritional Value of Tamisie
| Nutrient | Quantity (Per 100g) | Health Benefits |
|---|---|---|
| Calories | 180 kcal | Provides energy |
| Protein | 5g | Builds muscles & tissues |
| Carbohydrates | 36g | Main source of energy |
| Fiber | 4g | Aids digestion |
| Vitamins (B & C) | Moderate | Boosts immunity |
| Minerals (Iron) | 2mg | Supports blood health |
Tamisie, when made with minimal oil and natural sweeteners, becomes a healthy alternative to heavy fried foods.
Health Benefits of Tamisie
-
Energy Boost: The carbs in Tamisie provide sustained energy for long hours.
-
Digestive Health: High fiber content supports gut health.
-
Low Fat: Ideal for those aiming to maintain a balanced diet.
-
Rich in Micronutrients: Vitamins and minerals make it a nutritious choice.
-
Weight-Friendly: Low calorie when prepared with minimal sweeteners.
Comparison Chart: Tamisie vs Other Popular Foods
| Feature | Tamisie | Pancakes | Muffins |
|---|---|---|---|
| Preparation Time | 20-25 min | 30 min | 45 min |
| Calories (per 100g) | 180 kcal | 227 kcal | 305 kcal |
| Fat Content | Low | Medium | High |
| Taste Profile | Mildly Sweet | Sweet | Very Sweet |
| Ideal Meal Time | Breakfast/Snack | Breakfast | Dessert/Snack |
How to Make Tamisie: Step-by-Step RecipeIngredients:
-
1 cup rice flour
-
½ cup coconut milk
-
2 tbsp natural sweetener or jaggery
-
A pinch of salt
-
1 tsp yeast (optional for softness)
Instructions:
-
Prepare the Batter: Mix rice flour, coconut milk, jaggery, and salt in a bowl.
-
Fermentation (Optional): Leave the mixture for 30 minutes for better texture.
-
Steaming: Pour the batter into small bowls and steam for 15 minutes.
-
Cooling: Allow to cool before serving.
-
Serve: Enjoy with tea, coffee, or as a standalone dish.
Modern Variations of Tamisie
-
Chocolate Tamisie: Adding cocoa powder for a dessert version.
-
Savory Tamisie: Using herbs and spices for a spicy twist.
-
Fruit Tamisie: Adding mango, banana, or berries for natural sweetness.
Tips for Perfect Tamisie
-
Always use fresh ingredients for the best taste.
-
Steaming ensures a soft and spongy texture.
-
Adjust sweetness based on personal preference.
5 FAQs about Tamisie
Q1. Is Tamisie a dessert or a main course?
A: It is mainly a snack or breakfast item, but sweet versions make great desserts.
Q2. Can I make Tamisie without sugar?
A: Yes, you can use natural sweeteners like honey or dates.
Q3. Is Tamisie gluten-free?
A: If prepared with rice flour, it is naturally gluten-free.
Q4. How long can I store Tamisie?
A: It stays fresh for 1-2 days at room temperature or up to a week in the fridge.
Q5. Can Tamisie be made vegan?
A: Absolutely, just use plant-based milk alternatives.
Conclusion
Tamisie is more than just a dish; it is a celebration of simple, nutritious, and delicious cooking. Its versatility, health benefits, and delightful taste make it a must-try for food lovers everywhere. Whether you prefer sweet or savory, traditional or modern, Tamisie adapts beautifully to your taste buds.

1. Introduction
Calandrando represents a unique culinary journey that merges innovation with tradition. Food enthusiasts seeking something extraordinary can discover an exquisite blend of flavors, textures, and experiences. From vibrant appetizers to complex desserts, Calandrando showcases a world where each dish tells a story. This culinary adventure goes beyond mere eating—it’s about engaging the senses, understanding the ingredients, and appreciating the artistry of the culinary world.
With the rise of modern gastronomy, Calandrando has carved its niche, captivating chefs and diners alike. This article explores every aspect of Calandrando, from its origins to its signature dishes, and offers practical insights for those wishing to enjoy it at home or in fine dining settings.
2. What is Calandrando?
Calandrando is a culinary style that emphasizes creativity, high-quality ingredients, and an immersive dining experience. It blends traditional techniques with modern innovations, delivering meals that are not only flavorful but visually stunning. Each plate represents a balance of taste, texture, and presentation, making the dining experience both satisfying and memorable.
This cuisine also prioritizes locally sourced ingredients, seasonal freshness, and sustainable practices. By doing so, Calandrando creates dishes that are not only delicious but environmentally conscious and health-oriented.
More Article Here
3. The Origins of Calandrando
The origins of Calandrando are rooted in centuries-old culinary traditions, evolving through modern influences. It draws inspiration from regional specialties while embracing global techniques. Historical records suggest that early Calandrando chefs focused on the harmony of flavors, emphasizing natural ingredients and artisanal methods. Over time, this approach expanded into a more contemporary culinary philosophy, combining innovation with a respect for tradition.
4. Signature Dishes and Flavors
Calandrando is renowned for its diverse range of dishes. Signature meals often include a combination of fresh seafood, tender meats, vibrant vegetables, and unique spices. Desserts are equally creative, incorporating textures like mousse, gelato, and delicate pastries.
Some hallmark dishes include:
-
Herb-Infused Roasted Meats: Slow-cooked with aromatic herbs for depth of flavor.
-
Seafood Medleys: Fresh catches seasoned with subtle spices to enhance natural taste.
-
Deconstructed Desserts: Combining unexpected textures for a memorable culinary surprise.
Each dish is carefully designed to engage all senses, leaving a lasting impression.
5. Culinary Techniques Behind Calandrando
Calandrando chefs utilize a range of advanced techniques to craft extraordinary meals:
-
Sous-Vide Cooking: Ensures precise temperature control for perfect texture.
-
Molecular Gastronomy: Adds modern flair to traditional dishes, creating unique presentations.
-
Smoking and Curing: Enhances flavor profiles while maintaining the integrity of ingredients.
-
Artful Plating: Focuses on aesthetics to elevate the dining experience.
These techniques ensure that each dish is not only tasty but visually captivating, reflecting the artistry behind Calandrando cuisine.
6. Ingredients That Define Calandrando
High-quality ingredients are central to Calandrando cuisine. Commonly used elements include:
-
Organic vegetables and herbs
-
Fresh seafood and ethically sourced meats
-
Exotic spices and seasonal fruits
-
Handcrafted cheeses and dairy products
These ingredients are carefully combined to highlight natural flavors while maintaining a balance of health and taste.
7. Experience and Ambiance
Calandrando is not just about food; it’s an immersive sensory experience. Restaurants and events focus on ambiance, lighting, music, and service, ensuring that every visit is memorable. The dining environment is thoughtfully curated to complement the culinary creations, creating a holistic experience that engages sight, smell, taste, and touch.
8. Comparison Chart: Calandrando vs Other Culinary Styles
| Feature | Calandrando | Traditional Cuisine | Modern Fusion Cuisine |
|---|---|---|---|
| Flavor Profile | Bold yet balanced | Classic | Experimental |
| Ingredients | Locally sourced, fresh | Common, seasonal | Diverse, global |
| Cooking Techniques | Advanced & artistic | Conventional | Mixed approaches |
| Presentation | Highly artistic | Simple | Creative |
| Health & Sustainability Focus | High | Moderate | Variable |
This chart highlights why Calandrando appeals to modern diners seeking quality, creativity, and sustainability.
9. Why Calandrando Stands Out
Calandrando’s appeal lies in its combination of tradition and innovation. It caters to both seasoned food connoisseurs and casual diners by offering a unique, memorable experience. The focus on fresh ingredients, artistry, and immersive dining makes it a standout choice for anyone seeking more than just a meal.
10. How to Enjoy a Calandrando Experience
To fully enjoy Calandrando, consider the following tips:
-
Choose dishes that showcase seasonal ingredients.
-
Engage with the chef or server to understand the story behind each dish.
-
Pair meals with carefully selected beverages to enhance flavors.
-
Take time to appreciate the presentation and aroma before tasting.
Whether dining out or recreating dishes at home, attention to detail enhances the overall experience.
11. Health Benefits of Calandrando Cuisine
Calandrando is health-conscious by design:
-
Uses fresh, nutrient-rich ingredients.
-
Emphasizes balanced portions and cooking methods that retain nutrients.
-
Incorporates antioxidant-rich herbs, fruits, and vegetables.
Regularly enjoying Calandrando dishes can support overall well-being while providing a satisfying culinary experience.
12. Tips for Home Cooking Calandrando Dishes
Recreating Calandrando at home requires focus on quality and technique:
-
Source fresh, high-quality ingredients.
-
Experiment with presentation and plating.
-
Use gentle cooking techniques like steaming or slow-roasting.
-
Incorporate herbs and spices to enhance natural flavors.
Practicing these tips allows home chefs to replicate the elegance of Calandrando cuisine.
13. Seasonal and Regional Variations
Calandrando cuisine adapts to seasonal availability:
-
Spring: Light salads, fresh greens, and delicate seafood.
-
Summer: Grilled vegetables, vibrant fruits, and refreshing desserts.
-
Autumn: Hearty stews, roasted meats, and earthy flavors.
-
Winter: Slow-cooked dishes, warm spices, and rich textures.
Regional variations add local flair, incorporating unique ingredients and cooking traditions.
14. Calandrando Events and Culinary Festivals
Food festivals and exclusive dining events often feature Calandrando cuisine. These occasions allow chefs to experiment with new dishes and engage with food enthusiasts. Attendees gain insight into culinary techniques, ingredient sourcing, and the artistry behind each plate. Such events also encourage community building among culinary professionals and food lovers.
15. Conclusion
Calandrando is more than a culinary style—it’s a full-scale gastronomic adventure. By merging tradition with modern innovation, focusing on high-quality ingredients, and emphasizing immersive dining experiences, it appeals to food enthusiasts worldwide. Whether exploring signature dishes at a restaurant or recreating recipes at home, Calandrando offers an unforgettable journey for the senses.
16. FAQs
1. What makes Calandrando different from other cuisines?
Calandrando combines traditional techniques with modern innovation, focusing on high-quality ingredients, artistic presentation, and immersive experiences.
2. Can I cook Calandrando dishes at home?
Yes! Using fresh ingredients, proper techniques, and attention to plating can help recreate Calandrando dishes at home.
3. Are Calandrando dishes healthy?
Absolutely. The cuisine emphasizes fresh, nutrient-rich ingredients and balanced cooking methods.
4. What are the key flavors in Calandrando cuisine?
Calandrando highlights a balance of bold and subtle flavors, often enhanced with herbs, spices, and seasonal ingredients.
5. Where can I experience Calandrando cuisine?
Specialty restaurants, culinary events, and curated dining experiences offer the opportunity to enjoy authentic Calandrando dishes.

Introduction
What is Gelamento Galore and why has it become a phrase that excites food lovers everywhere? At its heart, Gelamento Galore is more than just a frozen dessert; it’s a celebration of craftsmanship, taste, and indulgence. It combines silky textures, rich flavors, and a dash of artistry to create an experience that goes beyond eating. Each spoonful tells a story of tradition, creativity, and joy.
In this article, we’ll dive deep into the world of Gelamento Galore—its origins, unique qualities, and how it has risen as a symbol of gourmet indulgence. Whether you’re a curious first-timer or a connoisseur of frozen desserts, this guide will give you everything you need to appreciate Gelamento Galore fully.
1. The Origin of Gelamento Galore
The concept of Gelamento Galore originates from centuries-old traditions of frozen desserts that began in Europe. Over time, artisans refined recipes, combining milk, sugar, and natural flavorings to craft an experience that transcends taste. Gelamento Galore became the epitome of luxury, where quality and tradition meet modern creativity.
More Article Here
2. Why Gelamento Galore Stands Out
Unlike ordinary desserts, Gelamento Galore emphasizes freshness and texture. It uses a higher ratio of natural ingredients with less air, giving it a creamy density that feels rich yet smooth. The focus is always on the integrity of flavor—whether fruity, nutty, or chocolaty.
3. Traditional vs. Modern Approaches
Traditionally, Gelamento Galore followed strict methods: slow churning, fresh milk, and authentic ingredients. Today, while many artisans keep these traditions alive, modern approaches include plant-based variations, sugar-free recipes, and even fusion flavors inspired by global cuisines.
4. Popular Flavors That Define Gelamento Galore
-
Classic Vanilla – timeless and elegant.
-
Dark Chocolate – bold, rich, and indulgent.
-
Pistachio – nutty perfection with subtle sweetness.
-
Strawberry Swirl – refreshing, fruity delight.
-
Salted Caramel – a perfect balance of sweet and savory.
5. Crafting the Perfect Scoop: The Art Behind It
Creating Gelamento Galore is as much an art as it is science. The churning process is carefully timed, the temperature precisely controlled, and the flavor balance meticulously adjusted. Each scoop is the result of patience and artistry, ensuring consistency in texture and taste.
6. Nutritional Aspects You Should Know
Gelamento Galore contains essential nutrients such as calcium, protein, and vitamins from milk and natural ingredients. However, it can also be calorie-dense. Portion control allows you to enjoy the indulgence without guilt. Health-conscious variations, like low-sugar or vegan options, provide alternatives for different lifestyles.
7. Cultural Significance of Gelamento Galore
Beyond being a dessert, Gelamento Galore is a cultural icon. It represents gatherings, celebrations, and moments of joy. Across the world, it has been embraced as a dessert that brings people together and sparks conversation over shared indulgence.
8. Seasonal Variations and Trends
Seasonal trends bring fresh excitement:
-
Summer: Tropical fruits like mango and pineapple.
-
Autumn: Pumpkin spice and cinnamon.
-
Winter: Peppermint and hazelnut.
-
Spring: Floral infusions like lavender and rose.
9. A Comparison Chart: Gelamento Galore vs. Ice Cream
| Feature | Gelamento Galore | Ice Cream |
|---|---|---|
| Texture | Dense and creamy | Fluffy and airy |
| Ingredient Quality | Focus on natural flavors | Mix of natural & artificial |
| Fat Content | Moderate | Higher |
| Serving Temperature | Slightly warmer | Colder |
| Flavor Intensity | Rich and pronounced | Mild and sweet |
10. How to Savor Gelamento Galore the Right Way
-
Eat it slowly to let the flavors unfold.
-
Pair it with fruits, nuts, or pastries.
-
Serve in chilled bowls for an elevated experience.
-
Experiment with toppings like honey or crushed almonds.
11. Healthier Options Emerging in Gelamento Galore
With rising health awareness, low-sugar, dairy-free, and plant-based variations are trending. Almond milk, oat milk, and coconut milk versions allow lactose-intolerant and vegan individuals to enjoy Gelamento Galore without compromise.
12. How Gelamento Galore is Winning Hearts Worldwide
The global demand has turned Gelamento Galore into a cultural ambassador of taste. Its adaptability to local ingredients and traditions makes it universally loved. From urban cafés to countryside shops, it continues to symbolize indulgence and quality.
13. The Future of Gelamento Galore
The future looks promising, with innovations in flavor, sustainability in sourcing ingredients, and personalization through technology. Soon, we may see AI-assisted flavor customization, allowing individuals to create their own Gelamento Galore recipes.
14. Tips for Hosting a Gelamento Galore Party
-
Offer a variety of flavors to suit all tastes.
-
Provide toppings for customization.
-
Serve mini portions for variety.
-
Pair with warm pastries or fresh fruit platters.
15. Expert Recommendations for Beginners
If you’re new to Gelamento Galore:
-
Start with classic flavors before exploring exotic ones.
-
Choose artisanal brands or small-batch makers.
-
Pay attention to texture—it should feel smooth, not icy.
16. FAQs
Q1. What makes Gelamento Galore different from ice cream?
Gelamento Galore is denser, creamier, and uses fewer artificial ingredients compared to traditional ice cream.
Q2. Can Gelamento Galore be vegan?
Yes, plant-based versions using almond, oat, or coconut milk are widely available.
Q3. Is Gelamento Galore healthier than regular desserts?
It can be healthier due to its use of natural ingredients, though portion control is key.
Q4. What are the most popular Gelamento Galore flavors?
Vanilla, pistachio, chocolate, strawberry, and salted caramel are widely loved.
Q5. How should Gelamento Galore be stored?
Keep it at a stable, cool temperature—slightly warmer than regular ice cream—for the best texture.
Conclusion
Gelamento Galore isn’t just a frozen dessert; it’s an experience that celebrates flavor, tradition, and artistry. From its creamy texture to its cultural significance, it continues to enchant people across the globe. Whether you’re indulging in a classic scoop or trying a modern twist, Gelamento Galore promises delight in every bite.

Introduction
In the realm of sushi, flavors often dazzle with raw fish, crunchy vegetables, or bold sauces. Yet among these familiar stars lies a humble, elegant classic: the kampyo roll. This sushi variant features dried gourd strips (kanpyō or kampyo) that are rehydrated, simmered in a sweet-salty sauce, and rolled in sushi rice and nori. Its subtle complexity, chewy texture, and unassuming charm make it a favourite in traditional Edomae sushi. In this article, you’ll explore the origin, preparation, variations, nutritional insight, and pro tips to master the kampyo roll.
What Is Kampyo (Kanpyō)?
“Kampyo” (also spelled kanpyō) refers to thin strips of dried gourd — specifically from a variety of calabash gourd — that are peeled, sun-dried, and preserved. In Japanese cuisine, these strips are rehydrated and simmered with seasonings before use, and they often appear in classic sushi rolls.
When transformed into a roll, these simmered strips anchor the flavors, offering a mild sweetness and chewiness that contrasts beautifully with vinegared rice and crisp seaweed.
More Article Here
Historical & Cultural Background
The use of dried gourd strips in sushi dates back to Edo (Tokyo) era sushi traditions. In many old Tokyo sushi shops, ordering a plain maki (nori roll) would implicitly mean kanpyō maki (kampyo roll). The roll became a staple of Edomae sushi, meant to cleanse the palate between courses or offer a delicate finish to a meal.
Over time, the technique of preparing kampyo evolved, but it always retained its place as a symbol of subtlety, restraint, and craftsmanship — a contrast to bold nigiri or extravagant specialty rolls.
Ingredients & Flavor Profile
| Component | Role in the Roll | Taste & Texture Contribution |
|---|---|---|
| Dried kampyo strips | Main filling | Mildly sweet, chewy, slightly fibrous |
| Soy sauce + mirin + sugar | Seasoning for kampyo | Umami, light sweetness, depth |
| Sushi rice (vinegared) | Vessel for the roll | Tart, slightly sticky, balancing agent |
| Nori (seaweed) | Wrapper | Slight oceanic aroma, crisp boundary |
| Optional garnish (sesame, pickles) | Accent flavor | Nutty or crunchy contrast |
The key is balance. The sweetness in the simmered kampyo should complement, not overwhelm, the tang in the rice.
Step-by-Step: How to Make Kampyo Roll
-
Rinse & Clean
Rinse the dried kampyo strips under cold water to remove surface dust. Some cooks gently massage them with salt to help soften and to remove any residual bitterness. -
Rehydrate & Soften
Submerge the strips in room-temperature water (or lightly salted water) for a few hours or until pliable. Discard excess water. -
Simmer & Season
Drain, then simmer the strips in a mixture of soy sauce, mirin, and sugar on low heat. Stir occasionally until almost all liquid is absorbed and the strips glisten. -
Cool & Trim
Let the strips cool. Trim or cut them so they align neatly with the width of your nori and sushi roll. -
Prepare Sushi Rice
Cook short-grain rice, then mix gently with a blend of rice vinegar, sugar, and salt while fanning to cool. -
Assemble
-
Lay a half sheet (for hosomaki) or full sheet of nori on the bamboo mat, shiny side down.
-
Spread a thin even layer of sushi rice, leaving about 1 cm border at the top edge.
-
Place the simmered kampyo strips centered in a horizontal line.
-
-
Roll Tightly
Lift the edge of the sushi mat closest to you, roll forward, pressing gently, sealing the nori border with a little moisture. -
Cut & Serve
Wet a sharp knife (to avoid sticking), slice into 4 or 6 pieces (traditionally 4), wiping the blade between cuts.
Variations & Serving Ideas
-
Oboro-kampyo roll: Combine the kampyo with oboro (minced prawn or fish paste) to add richness and a splash of color.
-
Sesame kampyo roll: Roll the finished roll in toasted sesame seeds for an extra nutty touch.
-
Inside-out style: For modern twist, flip the roll so that rice is on the outside, kampyo inside.
-
Kampyo + cucumber: Add thin cucumber strips alongside kampyo for fresh crunch.
-
Mini hand-roll version: Use smaller nori and wrap kampyo rice by hand for casual handheld sushi bites.
Nutritional & Health Insights
-
Low in fat: The gourd strips themselves are almost fat-free once simmered.
-
Rich in fiber: Kampyo retains dietary fiber, aiding digestion.
-
Minerals & micronutrients: The original dried strips contain potassium, magnesium, and small amounts of iron.
-
Lower sodium variant: You can reduce soy sauce or substitute low-sodium versions to control salt intake.
-
Vegan & plant-based friendly: As long as no animal products are added (e.g. oboro), kampyo roll suits vegan diets.
Because kampyo roll is simple, its health value lies more in moderation and balance with other sushi items rather than being a “superfood” itself.
Comparison: Kampyo Roll vs. Other Simple Sushi Rolls
| Feature | Kampyo Roll | Kappa Maki (Cucumber Roll) | Tekka Maki (Tuna Roll) |
|---|---|---|---|
| Major filling | Simmered dried gourd | Raw cucumber strips | Raw tuna slices |
| Flavor | Sweet + umami | Crisp, watery, fresh | Savory, rich, meaty |
| Texture | Chewy, slightly fibrous | Crunchy, fresh bite | Tender, delicate |
| Dietary profile | Vegan, low fat | Vegan, light, hydrating | High protein, moderate fat |
| Role in meal | Palate cleanser, subtle | Refreshing interlude | Centerpiece roll |
This chart helps readers grasp where kampyo roll fits among sushi roll options.
Pro Tips & Common Pitfalls
-
Use fresh, quality dried kampyo — older or overly brittle strips may not soften properly.
-
Rehydrate slowly — rushing with hot water may break the strips.
-
Simmer gently — high heat can make the strips brittle or burnt.
-
Cut with a wet knife — minimizes rice sticking and keeps clean edges.
-
Don’t overfill — overstuffing leads to loose or bursting rolls.
-
Serve quickly — sushi rice hardens over time; kampyo roll is best eaten fresh.
FAQs (before conclusion)
1. What is the difference between “kanpyō” and “kampyo”?
They’re variant romanizations of the same dried gourd strips. The food and technique remain identical.
2. Can I make kampyo roll without mirin?
Yes. You can substitute a touch of sugar + light sake or omit mirin entirely, though flavor depth may slightly differ.
3. How long can simmered kampyo be stored?
Stored in an airtight container in the fridge, it can last 2–3 days. Avoid letting rice and kampyo sit together too long.
4. Is kampyo roll gluten-free?
Not always — soy sauce may contain wheat. Use a gluten-free soy sauce to ensure the whole roll is gluten-free.
5. Why is kampyo roll cut into only 4 pieces traditionally?
Historically, it suited packing in sushi boxes and prevented juice leakage. Some modern chefs now cut into 6 pieces depending on presentation and preference.
Conclusion
The kampyo roll embodies the art of simplicity in sushi — few ingredients, careful preparation, and refined balance. Its chewy, sweet-savory profile offers a contrast to bolder sushi flavors, and its vegan, plant-based identity makes it accessible to many. Once you master the rehydration, simmering, and rolling technique, you’ll appreciate how much character lies in this understated sushi roll. Try crafting it at home or ordering it at traditional sushi bars — either way, you’ll taste the legacy of Edo-era culinary restraint in every bite.

America/California Time Zone Guide: Never Miss a Meeting Again

The Rarest Arc Raiders Blueprints and How to Get Them

Speciering Guide: Powerful 7 Facts You Must Know

Top Chartered Accountants Benefits: Guide, Tips, FAQs & More

blogsternation .com: Complete Beginner’s Guide, Benefits, and FAQs

How Many Quarters in Football? A Complete Guide to Game Structure and Timing
-
 Business11 months ago
Top Chartered Accountants Benefits: Guide, Tips, FAQs & More
-
Tech10 months ago
blogsternation .com: Complete Beginner’s Guide, Benefits, and FAQs
-
Sports11 months ago
How Many Quarters in Football? A Complete Guide to Game Structure and Timing
-
Tech9 months ago
How to Upgrade Graphics Driver: Boost Speed, Fix Issues & Enhance Gaming
-
Editors Pick10 months ago
Astonishing Mist: Why Delta Flight DL275 Diverted LAX Mid‑Pacific
-
Editors Pick10 months ago
Craft “Your Topics Multiple Stories” into Engaging Multi‑Angle Narratives
-
Business10 months ago
Unlocking the Truth About gomyfinance.com Credit Score
-
Education11 months ago
Oxford Acceptance Rate: What It Means, Why It Matters, and How to Beat It